• About

Me Myself & Riggins

~ The activities and adventures of Riggins and me!

Me Myself & Riggins

Tag Archives: craft

Crinkle, Crackle, Crunch

04 Wednesday Dec 2013

Posted by wendynewell in Uncategorized

≈ Leave a comment

Tags

chew toy, craft, Dog, dog toy, puppy, sew, Shadow

1483311_10201392039777845_1076653169_n
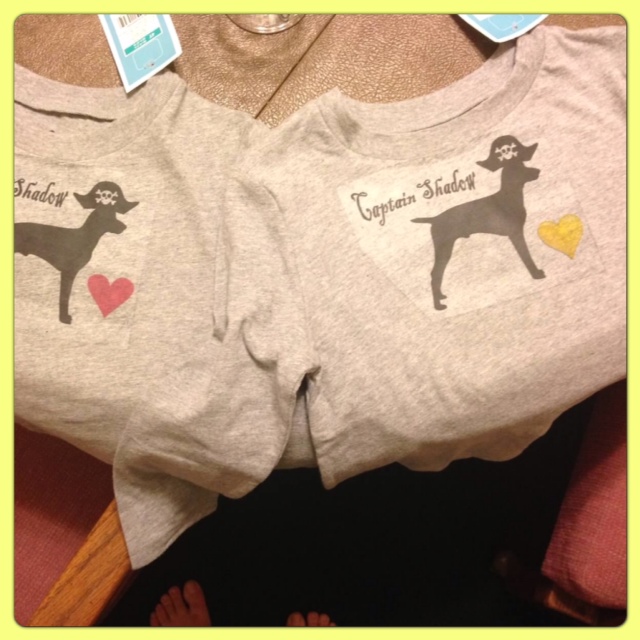
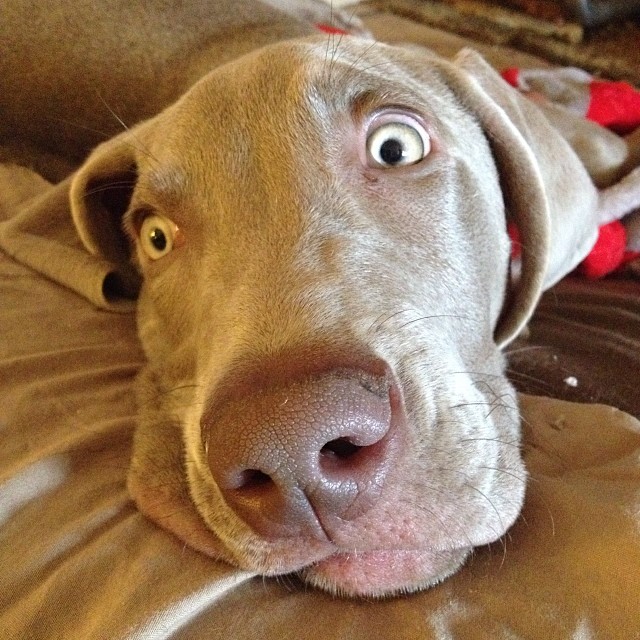
Before we all headed up to my sister’s house for Thanksgiving we were warned that the new puppy, Captain Shadow, was a chewer.  There are a ton of chew toys out there and many that are specifically for teething puppies.  Most of them look a lot like the products you would purchase for teething human babies.  I swear if you can make a product that can be marketed to both new baby parents and new dog parents you have made it.  Those are the two best consumer groups ready and willing to drop cash on anything.  When Riggins was little the best “chew” toy he had was a Hartz ball chew thing that I got at the supermarket.  Not at all fancy.  It was made of some sort of hard plastic was white and bumpy with super bumpy purple areas poking out of it.  I don’t think they make them anymore, but it was the best.  He would chew on that thing for hours.  The key was to find what Shadow liked.

I had purchased a little toy on clearance at Petco for Shadow but when I heard how much he was chewing I tossed that one to Riggins and decided to make him some toys.  Dogs like to chew and be destructive so my goal was to make him something that would be fun and easy to chew but at the same time gave him the feeling that he was really doing something.  If you google how to make dog toys a number of folks suggest using socks or towels.  Personally I think this sends a mixed message to the dog.  How is a puppy supposed to know the difference between his chew sock and the sock you plan to wear that day?

I designed the Captain Shadow Chew Toy.  To make this you will need an empty water bottle and an old baby blanket.  Any plastic bottle will do but the sturdier the better.  I made three of these and Shadow made quick work of the flimsy water bottle while the thicker sparkling water bottles had some staying power.  I cut out a piece of the baby blanket so that it would easily fit around the water bottle.  Next I sewed it into a pocket and stuck the water bottle inside.  Finally I sewed it closed.  To add some extra fun I sewed a tie strap to the top, wrapped it around and knotted it.  Two of the toys were as simple as that.  The third had extra “arms” hanging off of it and each was stuffed with something fun at the end.  Extra material, freezer paper, etc.  Anything that would make a crinkle, crackle, crunch sound or just be fun to chew.  The extra arms also allowed for tug of war games which are always a puppy favorite!

The water bottle inside each chew toy allows Shadow to make crinkle, crackle, crunching sounds which makes him very happy.  Personally I find them far less distracting than the constant “squeak” that most favorited toys have.

Shadow’s toys were pretty basic.  I didn’t do anything to decorate them or make them pretty although you certainly could.  Add some eyes and that “armed” bottle becomes an octopus.  Even without extra decorations Shadow loved his toys and was happy to munch on them.  That is when he wasn’t munching on a human!

You are going to be spending a lot of cash on your new four-legged family member.  If you can save some dough by making your own toys I say go for it!

Pass it on:

  • Email
  • Facebook
  • Twitter
  • Pinterest
  • More
  • LinkedIn

Like this:

Like Loading...

Holiday Table Place Cards – How To

03 Tuesday Dec 2013

Posted by wendynewell in Uncategorized

≈ 1 Comment

Tags

craft, dessert, holiday, table setting

photo 1 (18)My mom and dad headed up to my sisters for the Thanksgiving holiday earlier than I did.  Just before she left my mom found an adorable blog post explaining how to make Christmas Treat Place Cards.  She mentioned she had wished she had seen the post earlier since it would make a fantastic addition to our Thanksgiving table.  They looked like fun so I volunteered to make them.  As usual, I glanced over the original how-to before going out on my own.  The original are pretty fantastic so if you want to make this “right” head on over to A Spoonful of Sugar and check out her blog.  If you prefer to take the road less traveled and want to follow me … read on!

* Grab your freezer paper (I used freezer paper instead of baking paper because that is what my mom had on hand when she brought me the supplies for this craft.  The freezer paper is nice because it’s a little heftier although I like that you can see the treats through the thin baking paper.  Pick your poison.  Both seem to work.) and tear/cut out rectangles big enough to fit two of your chosen circle size on.

* Fold each paper rectangle in 1/2 and grab your circle pattern (I used an empty ribbon spool because it was sitting there staring at me.  You can use a wine glass, wine bottle, coaster, really anything round that you have on hand.  This is just a list of the things I happen to have close to me at all times).  Draw a circle on each folded paper.  I used a pen.  Don’t do that.  Use a pencil.  The pen was annoying since it was impossible to make the writing disappear.   The lighter the circle you make the better off you are.  Logically I knew this before I started tracing around my ribbon spool but I couldn’t find a pencil.  Do as I say not as I do.

* Grab some thread and get your sewing machine ready.  To be fancy I used brown thread on the bobbin and red thread on the top.  Okay.  I admit it.  I wasn’t being fancy just lazy.  I already had a full bobbin full of brown thread and it was just easier to do that.

* Carefully sew around each circle you traced leaving a small gap at the top.  Sewing a small circle really isn’t as easy as it seems.  At first I tried really hard to be perfect but I kept failing.  Then I tried to go RIGHT on top of the pen line and failed.  So I eventually gave up and just whipped around the inside of the circle I drew in the hopes that the next step would make most of the pen mark disappear.

* Grab your fancy edged scissors and cut out those circles.  Technically you can use regular ol’ scissors but, lets face it, the fancy ones are kinda cool.  I really like the ones I have since it isn’t that important to make perfect lined up cuts like it is with a basic scallop edge.  Use what you have.  I’m sure it will be gorgeous.

* I filled the goodie pockets with mini m&m s.  The mini ones fit really well especially since I didn’t leave much room open at the top of each circle!  Of course you can fill it with anything that fits.  After dinner mints would be fun.  I made one for Riggins and Captain Shadow that had doggie training treats in them.  Poor Kira got scolded by a number of adults for feeding the dogs chocolate (an obvious no-no) before I could inform them they were made with dog safe treats.

* Obviously you can decorate the front anyway you want.  I picked out a few sheets of scrapbooking paper that seemed fall-ish and cut them into little strips.  Then I sewed the strips to the treat pockets right where the opening was.  Now the treat pockets aren’t only decorated but sealed!

photo 2 (18)* Finally I added a ribbon and name tag that I printed off the computer.  If I was to do this again I wouldn’t have glued on the ribbon but instead sewed it on at the same time I did the decorative paper.  Oh well.  Live and learn.

* Place your fantastic creations at each place setting.  When it is time to eat just rip open.  The freezer paper is kinda tough to tear but some genius at our table (I really wish I could say it was me but I think it was my mom or maybe Logan) realized if you rip off the decorative paper like a tag it re-opens the top giving you access to the secret treats!

There you go!  Festive, yummy, and fun place cards for your holiday table.  They were a big hit!

Holiday dog no-nos – Everyone seems to know that chocolate is bad for dogs but here are some items you may have around your house during the holidays that should also stay away from your puppers mouth:

  • Raisins and Grapes – second biggest vet bill I ever had was because Riggins ate some yogurt covered raisins.  It is also one of the few times he has had to spend the entire night at the vet.  Neither one of us was very happy.  My house is now grape/raisin free.
  • Poinsettias – bad flower.  I had these growing in my backyard when I moved to this house and had to have the gardener take them out.  I suppose I could have done it myself … but I didn’t.  Holly and mistletoe are also bad holiday plants.  Your Christmas Tree is mildly toxic so to be safe go fake!
  • Macadamia Nuts – Most nuts aren’t good so just stay clear of any of them.
  • Sugar – Sugar isn’t great but Xylitol is deadly even in small amounts.  I suggest not using the sugar substitute and when possible don’t purchase products that have it (gum, candy, mouthwash & toothpaste sometimes do … your dentist wants you to use it since it is actually good for your teeth and gums).
  • Alcohol 
  • Cooked bones – they easily splinter and can cause damage.  Most raw bones are fine but just keep an eye on the dog and when the bone starts splintering take it away.
  • Onions and chives are bad.  

Oddly cinnamon and garlic aren’t bad and in the right quantities can actually be good.  There are a zillion other bad/good things so google and ask your vet for others.


Pass it on:

  • Email
  • Facebook
  • Twitter
  • Pinterest
  • More
  • LinkedIn

Like this:

Like Loading...

Crafts, Wine & Friends

25 Monday Nov 2013

Posted by wendynewell in Uncategorized

≈ 2 Comments

Tags

10 minute runner, craft, friends, sewing, wine

photo 1 (16)One of the reasons I like making crafts and such is because I always feel so proud of myself when I’m finished.  I can stand back and say, “I DID THAT!”  I wanted my friends to have the opportunity to feel that way so I thought I’d invite them over to make their own 10 minute runner.  It just seemed natural to add wine to the mix.  This last Saturday my tiny house was full of crafty friends.  My dining room (which is tiny) became the sewing and gossip room.  The kitchen (also quit small) was the food and wine hook up.  My back entry photo (15)mud room (not really even a room) area housed the iron board and iron.  Finally my office (not a bad size) served as the cutting room.  It was like our own little factory.  Really boozy factory!  It was a lot of fun.

I’ve blogged about the 10 minute runner in the past (actually twice – here and here) so won’t make you read through all that again.  It’s a great project since it is fast and easy.  We had every level of sewing experience represented and everyone’s final result was perfection!
photo 3 (10) If you have a machine you can whip these up in no time.   Add a candle and they become the perfect hostess gift.  Everyone in my family has accumulated quite the collection.  One for each holiday/season … at least.

Even those who didn’t take part in the “craft” portion of the afternoon still had fun sipping on wine (a number of us drank the wine/sparkling water Giovanna special) and catching up.  Thanksgiving is almost here and one of the things I’m thankful for is being able to hang out and have fun with my lovely friends and family!

Pass it on:

  • Email
  • Facebook
  • Twitter
  • Pinterest
  • More
  • LinkedIn

Like this:

Like Loading...

Self Binding Receiving Blanket – How-To

04 Monday Nov 2013

Posted by wendynewell in Uncategorized

≈ 1 Comment

Tags

Asscher, baby blanket, baby shower, blanket, craft, dog blanket, dogs, how-to, receiving blanket, Riggins, self-binding blanket

Asscher and Riggins model.

Asscher and Riggins model.

I tricked you again!  This isn’t really a step by step how-to since those are boring to write.  Instead I’ll just link you to the ORIGINAL how-to that I used.  You are way better off getting instructions from that lady than me.  Believe me.

This past weekend I went to a friends baby shower.  I’m not good at baby showers.  I never have been but it has gotten worse in my old age.  I don’t know if it is all the pastels (this party theme was “Breakfast with Tiffany” since the mother-to-be’s name is Tiffany so the colors were pretty cool), or maybe the overwhelming scent of flowers everywhere.  Perhaps it’s the silly games (games at yesterday’s function were painless … we have gone to/thrown a lot of these and have all learned) or the claustrophobic nature of oodles of women crammed into a small space.  If I’m being honest the entire event just leads to me being sad.  If you are a single with no children woman, like myself, baby showers can be somewhat torturous.  Thank goodness all your friends are around and it’s a joyful occasion or it would be too overwhelming.  Me?  I head right for the booze in a “Don’t (Note cupcakes.)mess with me just pour the champagne sans orange juice before my jealousy causes me to go insane and dive head first into those carefully displayed cupcakes!”  That’s right mothers-to-be if you want to know what your single/no children girlfriends are thinking during the festivities its pure jealousy calmed only by the soothing love of alcohol.  I suppose I may be the only person on earth who feels this way but I doubt it.  Perhaps I’m the only one who admits it.  

Still … baby showers are a happy time and even in my state I can see how overwhelmed with joy the mommy is.  Plus a friend’s baby shower gives me a reason to get out the sewing machine and be crafty.  THAT I really love!  (There is a JoAnns opening in my hood this Friday … I’m giddy.  I’m not going to be in town for the opening which kinda bums me out.  I bet it will be fabulous.)

photo 2 (1)My mom had recently made some receiving blankets for a friend and told me about them.  She had me at “self-binding.”  If you have ever made a baby blanket of any kind you know the binding is a real pain in the butt!  This blanket is “self-binding.”  THAT is something to celebrate.  

My mom and I carefully picked out material.  Of course I headed straight for the dog themes, as if there was any other choice.  My mom asked if the guest of honor like dogs and I said, “sure … who doesn’t?”  Since I felt bad for forcing my theme onto my friend I also picked out one just for her.  Because of my dog obsession my friend would get two blankets.

When I was ready to get started on the blankets I watched this how-to video.  HOW EASY IS THAT?  It’s kinda brilliant.  Self binding … and the corners … loving it!  Oddly enough it was as easy as the nice woman in the video made it seem.  The blankets turned out great and I HIGHLY suggest you give this a try.  It’s super fun and the result is an amazing burrito baby blanket!  Not just for babies … you can make them for anyone.  My mom photo 3made one for my sister’s puppy!  I love anything that can be marketed to both dog parents and human baby parents.  They are the two craziest of consumer groups and are goldmine!

To finish off the blankets, and make it painfully obvious they were handmade by yours truly, I added a couple little tags safety pined to each.  Everyone loved them and since you are in charge of the fabric choices you can control the colors and theme. Creativity at it’s finest!

There you go!  Get to sewing.  I’m off to take MY babies (Riggins and Asscher) for a walk!


Pass it on:

  • Email
  • Facebook
  • Twitter
  • Pinterest
  • More
  • LinkedIn

Like this:

Like Loading...

10 Minute Table Runner – Hot Tips

14 Monday Oct 2013

Posted by wendynewell in Uncategorized

≈ 3 Comments

Tags

craft, dogs, Halloween, how-to, sewing, table runner

photo (20)I wrote about the 10 minute table runners before.  In fact before sitting down at the sewing machine this weekend I re-read the blog post to make sure I remembered what I was doing!  The 10 minute table runner really is an easy and fun thing to make.  You can find the how-to here.  After making four of these I feel like I’ve become an expert and can share some important tips with you.

  • Fabric choice is key.  Avoid anything with straight lines or straight patterns.  Why make it harder on yourself.  Random patterns mean you don’t have to worry as much that you cut and sew at a perfect angle!
  • The brighter the better.  Bright colors will distract viewers from looking too close at your sew line and any holes from sew lines that didn’t make it and had to be ripped out with a seam ripper.
  • Have your mom cut your fabric for you with her quilting equipment.  Cutting something so it is perfect is a pain in the butt.  I suggest you don’t do it if you don’t have to.
  • 10 minutes is a big fat lie.  I’d say closer to 30 minutes and that doesn’t count getting the sewing machine out, threading the machine, getting the fabric cut correctly, etc.
  • Pins and the iron are your friend.  This is definitely a project where prep helps you out in the long run.
  • You’ll notice the instructions suggest use of a button while the one I made this weekend has tassels (made by my talented mother as if we were full Amish and don’t buy into silly store-bought niceties).  The button can cover up mistakes with lining up the two sides of your runner while the tassels are easier to sew on (just stick them in, tassel side inward, and sew at the same time you are sewing the sides together).  Pick your poison.
  • photo (19)Cursing usually helps any and all negative sewing situations you may find yourself in.
  • Longer stitches are easier to take out if you make a mistake.  It isn’t like you are sewing the crotch of some pants that need to be sturdy.  It’s a table runner.  It just has to sit on a table and look pretty.
  • It doesn’t matter how long you take trying to make the sides of the runner perfectly even.  They never will be.  Don’t sweat too much over it.  This is the step which usually takes me the longest and I have yet to get those stupid sides as perfect as I want them.

With these hot tips the 10 Minute Table Runner is pretty fun to make.  What are you waiting for?  Head on down to the fabric store and pick out some fancy material!

(Note – My mom found and purchased this fancy fabric for me.  Isn’t it brilliant?!?)

Pass it on:

  • Email
  • Facebook
  • Twitter
  • Pinterest
  • More
  • LinkedIn

Like this:

Like Loading...

Stuff I Made

07 Monday Oct 2013

Posted by wendynewell in Uncategorized

≈ 1 Comment

Tags

animals, Buddy, Captain Phillips, Captain Shadow, cats, craft, dogs, glasses, how-to, kira, Missy, pirates, puppy, t-shirt, w, weimaraner

I can’t really consider this post a “how-to” since I’m not telling you how to make these crafts.  It’s more of an announcement:

LOOK AT THE COOL THINGS I MADE FRIDAY.

photo 1 (4)More Animal Wine Glasses – First of all we have to have a moment of silence for my Asscher wine glass (honoring my golden retriever daycare baby) that I made for myself.  I used that one the most so, of course, it was the first to be broken.  Boo!  Now that we have taken the appropriate amount of time to mourn that loss to my wine cabinet … One of my good friends, Michelle, had her birthday celebration this weekend.  Luckily for me it was at a winery so I could easily them my gift around that.  Recently Missy had to say goodbye to her photo 2 (5)adorable pug mix, Buddy.  He had a wonderful long and loving life with her.  It didn’t take long for Missy to realize that her cat, Romeo, needed another dog playmate (as did she).  She adopted a long-haired dachshund mix from the newly opened NKLA (No Kill LA).  I decided to decorate her glasses in honor of her current and former pets who have given (and give) her so much joy.  I have written a “how-to” on this already so check it out – here.

photo 3 (3)Doggie T-Shirts – In other dog news my sister and her family got a new puppy!  There were down this weekend to pick him up.  He is an 8 week old weimaraner named Captain Shadow.  My young nephew loves pirates with all his heart (I suggested to get him over that phase we take him to see Captain Phillips but no one else seems on board with that idea) that’s where the “Captain” comes from.  I’m not sure were “Shadow” comes from.  Maybe because he is silver … you will have to ask my sister.  I decided my niece and nephew needed a t-shirt that featured their new puppy!  I hadphoto 4 (3) some left over printable t-shirt transfer paper from a project I did 10 years ago.  I’m sure the age may make the t-shirt design less durable but I had it in my drawer so I used it!  Between clearance and the new Cartwheel app I was able to get grey t-shirts for $3 each at Target.  Woo hoo!  I figured it wouldn’t take me long to whip up a design.  I was wrong.  I decided the dog needed a pirate hat on him I don’t really have great picture manipulating software so it took me a bit to figure out how to do that on paint.  Longer than I care to admit.  Then I had to remember how to flip all the images (you have to do that when you transfer onto light colors).  The entire process took longer than I expected but I finally finished!  I’d explain how exactly I did it but, to be honest, I forgot.  Sorry!

Happy crafting!

Pass it on:

  • Email
  • Facebook
  • Twitter
  • Pinterest
  • More
  • LinkedIn

Like this:

Like Loading...

A Statement Piece – How-To

30 Monday Sep 2013

Posted by wendynewell in Uncategorized

≈ 5 Comments

Tags

birthday, birthday crown, craft, flower headbands, flowers, headbands, how-to, statement piece

A few weeks back my friend Dee Dee sent me to this website – HERE.  Along with the suggestion that we get on that fast!  Just a week or so later my friend Esther received this for her birthday:

photo (11)

It was a sign!  It was really two signs, that I needed to get the glue gun out and make some flower headbands!  I just needed a reason … then I remembered the perfect occasion.  Our friend Tricia’s birthday party was this past weekend.  A few of us couldn’t attend the actual gathering so went Hollywood bar hopping with her instead.  The ladies involved and the location was the perfect storm for gigantic flower headbands!

photo 1A little about me.  I live for “statement pieces.”  When I had a much more exciting life and went out more I would wrap myself in ribbons or a hat or a giant flower or …..   I love it!  What is the point of going out if people aren’t going to stare at you.  That’s my philosophy!

Off to Michael’s I went.  The flowers that were used for my friend Esther’s Frieda Kahlo inspired headband were super fancy roses.  I found them … they were $10 EACH.  I don’t care how pretty the flower is I’m not spending ten bucks on it!  Luckily for me the fall flowers were on sale and it was easy to find a few bundles that were well priced and pretty.  For the birthday girl I went a little fancier and got a softer color.  Me?  I’m not a soft color type of gal!  I want primary colors and I want them to be bold!

photo 5After a quick stop at Rite Aid (or something similar) to grab a bundle of basic headbands I headed back to my house to get the glue gun turned on.  Then I watched the premiere episode of Grey’s Anatomy that I had recorded earlier in the week.  That gave my glue gun approximately 1 1/2 hours to heat up to a temperature that could have the gun second as a spot welder.  I have the old fashion glue gun that spits out molten lava and causes me to scream FUUUUUUCCCCCKKKKK on a fairly constant basis while using it.  The instructions on the site say to pull off the photo 4flower head from the stem and cut of the little stem that is left.  Don’t do that.  That little stem is what holds everything together.  Do pull off the flower head and just leave it at that.  Then grab your hot glue gun (aka tool of torture) and glob it on the flower.  I had to hold the flower in place, above my head, up to the ceiling fan to get it to set faster.  It is a little bit of a pain in the bum but not horrible.  Just keep piling giant flowers on your headband until you are satisfied.

Oh I forgot …. I covered the headbands with photo 2 (1)a strip of ribbon first.  I figured it would be prettier and would give the flowers something to stick too.  I had purchased a combo pack of headbands so each were a little different.  The ribbon helped unify them plus gave the super skinny headbands more real estate to work with.

After all were made I looked in awe at my creations.  They are BEAUTIFUL and were a big hit.  I was asked by folks more than once that evening where photo 3they could purchase one for themselves or their girlfriend/wife.  Yes they are big.  Yes they are bright.  Yes they are perfection!  Totally worth the multiple burns on my fingers and toe (yes I got hot glue on my toe) and the giant chunk of skin missing from my ring finger (if you get hot glue on you don’t pull it off … I repeat … don’t pull it off).  I’m sure it won’t be the last time you see pictures of me with giant flowers adorning my head like a mysterious fairy crown!

Pass it on:

  • Email
  • Facebook
  • Twitter
  • Pinterest
  • More
  • LinkedIn

Like this:

Like Loading...

Off the Registry

24 Monday Jun 2013

Posted by wendynewell in Uncategorized

≈ 3 Comments

Tags

craft, cross stitch, wedding, wedding registry

image (13)I believe there are two kind of gift givers in this world. Those who stay loyal to the registry and those that choose to go rogue. Almost everyone that I know is pro registry and very loyal to any gift list, wedding or otherwise. I am the exact opposite. I realize that there is a really good reason to make a registry or gift list. You get what you want that way. You don’t end up with a quesadilla maker taking up space in your kitchen cabinet (guilty). I, on the other hand like to be surprised by a gift. My nightmare is when someone asks what I want for a birthday or other occasion. I don’t know???? I was in charge of buying my folks Easter gifts for everyone this year and I ended up with a giant package of toilet paper. That’s what I really needed at that moment. Now toilet paper is very important and a wonderfully practical gift. I’m super happy I got that BUT it isn’t the most imaginative and fun gift out there.

As my friends and I get older I feel even less compelled to stay true to “the list.” After all we are all in our late 30s and 40s. What can we possibly register for that we don’t already have at this point (and that one of our broke guests can afford)? Not to mention registries are boring and impersonal (no offense to my pro-registry readers).

Since my friends John J and Emily got married this past weekend I had to contemplate the “on” or “off” registry question. I didn’t think long. I decided to make them a cross stitch sampler that was personalized for them.

Now stop for a second and read this before you continue … THIS is my nightmare http://jezebel.com/the-most-amazing-wedding-text-message-fight-of-our-time-514528769 WTF?????? Who are these people? I had already been fearful that the couple would think my gift wasn’t “good enough.” Close friends were given the leading questions of, “This is good right? This is enough? They will like this?” I only asked people who I knew would say “yes.” I read this horrifying article just after a had finished wrapping my handmade gift and started to shake with fear. I mean OMG. Admittedly all the people involved in those texts are off their rocker and horrible rude but COME ON LESBIANS … THAT IS NO WAY TO ACT!!!! I don’t care what you unwrap or what you pull out of a gift bag or envelope you ALWAYS SMILE AND SAY THANK YOU…. ALWAYS! Then you sit down and write a thank you note and stuff the quesadilla behind all your pots and pans.

It didn’t get better when I started reading the comments. Remember comments on online articles and blogs do bring out the crazy in people but the overwhelming majority of people were so pro registry I started to wimper a bit. I was the Sneetch with a star on my belly (or no stars — whichever group was originally in the minority). Then I remembered I like being a Sneetch with a star on my belly and unlike the weridos in that previous article my friends and I have manners. I proudly held my head high when I placed their gift on the gift table Saturday night.

photo (9)I got a little side tracked. Back to the gift. I used an old pattern my mom had in her cross-stitch pattern books, updated the colors to ones I actually liked, and made some other minor changes. It took me awhile to complete since I had to shelve it anytime I was watching a dog I was afraid could rip it apart! When I was finally finished I went over to Aaron Brothers and crossed my fingers that I’d find a frame and mat to match my creation. I kinda did. After some creative cutting of the pre-cut mat and a LOT of centering and pulling and taping and un-taping and centering again I finally got it “straight enough.” Ask anyone who has framed a cross stitch … it is much harder than actually making the thing in the first place. After getting everything in place I image (11)had to get the back put back on the frame … and it DID NOT want to fit. The cross-stitch and double mat had made the inside a little too fat for the frame’s liking. I did not give up. I kept at it until I had tamed that silly frame and showed it who was boss! I was sweating … a lot … way more than you think. I looked like I had just run a 5K not put a frame together. Whew!

Cross stitches are a ton of fun and pretty easy. If you are looking for a “starter” craft I suggest getting a cross-stitch set. You can buy this at craft/fabric stores but unless you like cats (they ALWAYS have ones with cats … may tell you a bit about those of us that do cross-stitch … don’t let that scare you) you are better off buying one online. A kit comes with everything you need. I promise you will be impressed with your final creating. Try it … you’ll like it.

CaptureIt was a wonderful wedding and I wish Emily and John J all the best! Congratulations. (I stole all the pictures of them from their Facebook page so “thanks” to whoever took them. Oh … and btw … I wasn’t the only one that laid down on the grass/floor. Come on … I was really tired … I just needed a short break …. who doesn’t?)

Pass it on:

  • Email
  • Facebook
  • Twitter
  • Pinterest
  • More
  • LinkedIn

Like this:

Like Loading...

Be Badass

12 Wednesday Jun 2013

Posted by wendynewell in Uncategorized

≈ 1 Comment

Tags

Art, craft, hot glue, Pinterest

image (4)You know when you see something on Pinterest you want to make so you have to then make up a reason why you need to do it?  That happened to me yesterday.  For awhile know I’ve seen wall hangings that had sayings written in hot glue and then painted monochrome (monochromatic … ahh I don’t know which is correct … one color).  I wanted to try making one!

I just had to think of a worthy recipient!  One of my good friends is sort of amazing maybe a little bit crazy but in an amazing way.  She is not just a marathon runner but an ultra marathon runner.  I didn’t even realize those existed until she started participating in them.  She recently told me she was going to be running a 50 mile race in Catalina.  50 MILES … ON AN MOUNTAIN FILLED ISLAND.  WHAT???????  She does a marathon every year on Catalina and last year I came with and ran a 10K.  Just over 6ish miles up and down hills.  AAAAAAHHHHHH.  She looked better after finishing her 26ish miles than I did after my “run”.  Now she is planning to almost double that distance.  That deserves some words of encouragement!

photo (6)I rushed to my craft closet(s) (which desperately needs to be organized as I found my glue gun in the first box I looked in but the glue was in the last) then to Michael’s to gather what I needed:

  • hot glue gun
  • hot glue
  • spray paint (for a canvas you only need a small can unless you want to use the rest for tagging later that day)
  • canvas (50% off at Michael’s right now)
  • pencil (harder to find in my house than you would think)

Although there are numerous examples of this craft on Pinterest I couldn’t find one with instructions.  How hard could it be?  Here is what I did:

  1. I printed out on the computer what I wanted to write so I would have something to refer to
  2. To act professional I first wrote on the canvas with pencil.  Tips to learn from my mistakes – hot glue is harder to manipulate than your pencil.  Put more space between letters and then you think you need.  After a while I pretty much ignored my pencil markings
  3. Then I grabbed my glue gun and went at it!  Tips to learn from my mistakes – treat the glue gun like a paint pen holding it perpendicular to the canvas.  Don’t touch the tip to the canvas but hold it away so you can get a nice clear 3d effect.  When writing letters act like you are teaching a kindergartener by making each line individual and picking up your “pen” after each movement.
  4. As you know hot glue dries fast (so don’t make mistakes) which makes it even more image (3)fun.  I need instant gratification!  When I was finished with my wording I used my finger to scrub off any glue “webs” between letters.  Tips to learn from my mistakes – this is a much more important step than I realized.  Do it well.  I’d suggest getting an old toothbrush or something and really scrubbing off any signs of webs.
  5. Then I grabbed some magazines to cover up the patio, told the dogs to stay away or they’d become a different color, and spray painted the top and sides.  That was pretty fun.

1/2 hour later I went back to get it and tada!  Art!

be brave

be strong

be badass

be you!

Good suggestions for all of us!

P.S. My mom asked why I didn’t center it.  I choose to be artistically off-center starting at the bottom left and working up.  To be honest I did this because I knew it would be a pain in the butt to actually center correctly.

Pass it on:

  • Email
  • Facebook
  • Twitter
  • Pinterest
  • More
  • LinkedIn

Like this:

Like Loading...

It’s The Thought That Counts

06 Thursday Jun 2013

Posted by wendynewell in Uncategorized

≈ 6 Comments

Tags

corks, craft, glass paint, hot plate, party, wigs

photo (7)June has become the month of Part-Ays!  Fun fun fun and presents needed.  Having little incoming cash my plan is to make as many gifts as possible (which reminds me I need to get back to that cross stitch I’m doing … STAT).  Something came up that required me to make a fancy wine glass for one of these occasions which opened the flood gates for everyone to receive designer glassware!  Nothing I have made so far has turned out the way it was supposed to … or at least the way I saw it in my head.

My friend Dee Dee had her birthday party last weekend.  It was a wig themed party because wigs are fun.  When my friends heard the theme there was no groaning about having to wear something silly on their head instead it was a chorus of “when and where!”  I’ve included just a small sampling of pictures from that night.  There are a zillion more and I’m afraid my sampling doesn’t include all the guests but you get the point.  It was a fun evening.

photo (4)Back to the gift.  First I made a cork hot plate.  Super easy.  Find a frame that works for you.  My frame size was determined by the number of corks I had available.  Get some mighty powerful glue and glue down the corks … TADA!  Couldn’t be easier … except I put a large art book on top to hold the corks down while the glue dried and chunks of super strength glue came spilling out the sides.  I tried to pick off as much as I could with a knife and then gave up.  My solution?  Paint.  I grabbed some black paint and went around the top of the frame (actually it’s the bottom because the corks fit better there).  It doesn’t look bad.  I was happy with it.

image (5)Then on to the glasses.  I didn’t want anything too complicated so decided animal silhouettes where my best bet.  After hours of internet searches I settled on the four I wanted and printed them out.  I cut out each and taped it to the inside of the glass so I could easily trace and then fill in with my glass paint pens.  Those paint pens are tough to work with.  First of all they dry pretty fast and you can’t really go back over anything (more about that when I post another craft gift in the future).  So you gotta like what you did the first time!  Secondly they aren’t image (4)exactly easy to draw with and even harder to keep the paint even throughout your design.  After I finished my talented drawings I stuck them in the oven for 40 minutes (once the oven is up to temperature.  I don’t remember what that temperature is but it’s on the glass paint pen instructions).  Of course glass can shatter in extreme heat to cold and visa versa so you gotta put the glasses into a cold oven so they warm slowly.  Then when the time is up open the oven door and let everything cool.  Be sure to keep all dogs out of the kitchen during cool down time as they are drawn to ovens, especially those that may have cooked on pizza goop at the bottom of them, and the last thing you need is a dog nose on hot glass.  That’s it.  That’s all there is too it.  I made a bunny, dog, squirrel, and chick.  I like the squirrel.  The others could have turned out a lot better.

Oh well!  It’s the thought that counts.  (Get ready everyone who will be getting gifts from me in the next few months.  There is still PLENTY of paint in those pens.)

Pass it on:

  • Email
  • Facebook
  • Twitter
  • Pinterest
  • More
  • LinkedIn

Like this:

Like Loading...
← Older posts

Most Recent Popular Posts:

  • Scatter Kindness!
  • 39 Acts of Kindness - 39 + a Pinch

Enter your email address to subscribe to this blog and receive notifications of new posts by email.

Join 1,112 other subscribers

Wendy’s Twitter Feed

  • @SpeakerMcCarthy I can see where you didn’t understand what was being said. It has to be difficult to focus when yo… twitter.com/i/web/status/1… 4 hours ago
  • @tedcruz Say all the public praise for President Biden’s State of the Union really pisses you off without saying al… twitter.com/i/web/status/1… 4 hours ago
  • @Simpsonite_ @MaryMar89610795 @jiffypalmer @ChevisMark @fi_dogs I’m using Whistle now too. Sadly Fi is better at tr… twitter.com/i/web/status/1… 4 hours ago
  • The heart shaped @cheerios taste better. I can’t prove it. You will just have to try them for yourself. 15 hours ago
  • RT @VP: Make no mistake: @POTUS and I will never back down in the fight for reproductive freedom. Congress must codify the protections of R… 17 hours ago
Follow @WendyNewell
Follow Me Myself & Riggins on WordPress.com

Wendy's Instagram (@wnewell)

No Instagram images were found.

Archives

Create a free website or blog at WordPress.com.

Privacy & Cookies: This site uses cookies. By continuing to use this website, you agree to their use.
To find out more, including how to control cookies, see here: Cookie Policy
  • Follow Following
    • Me Myself & Riggins
    • Join 155 other followers
    • Already have a WordPress.com account? Log in now.
    • Me Myself & Riggins
    • Customize
    • Follow Following
    • Sign up
    • Log in
    • Report this content
    • View site in Reader
    • Manage subscriptions
    • Collapse this bar
 

Loading Comments...
 

    %d bloggers like this: